


Quick Review:
With the vinyl face and adhesive back that is affixed to the wall, custom wall coverings are mostly suitable for advertising, decorative purposes, exhibitions, and other commercial solutions. Our vinyl wall coverings are incredibly durable and virtually maintenance-free, making them a wise and cost-saving choice to enhance your brand.
Possible Applications:
Stock Options: Low-Tack Wall Decal 7mil
Printed Side Options: One-Sided Full-Color
Product Specifications:
Size Options:
Different sizes are available for Custom Wall Coverings. Ordered sizes should fall between minimum 1 inch and maximum 48 inch for the width and between minimum 1 inch and maximum 3600 inch for the height.
Sets:
You can do two things with “Sets” field. First, you can multiple your orders of the same artwork if you cannot see your order quantity. It means in case of need to order more quantities than defined ones in “Quantity” field, you can select the numbers in “Sets” field. Second, if you have different versions of artworks, you can set the number of versions in “Sets” field.
Order by Choosing from the Following Options:
| Wall Decal Installation Guidelines: Lay your wall decal flat for about an hour prior to installation to allow the material to relax and flatten after shipping. 1. Lift the upper edge of the liner away from the vinyl and fold back approximately 3-6 inches (depending on the size of the graphic). 2. Carefully position the decal so that it is properly aligned on all sides, then press the upper corners in place using light pressure. 3. Using your hand or a soft plastic squeegee, lightly press the film in place. 4. Working from the top of the graphic to the bottom, continue by peeling away more of the liner and applying light pressure to the decal. Continue in this manner until the liner is completely removed and the decal is in place. 5. Finally, squeegee the decal from the center and work outward in all directions. 6. Be sure to squeegee the edges firmly in place. 7. Step back and admire your work! |
Unlike wallpapers, wall decals are straightforward to use. Here are some easy ways to apply wall decals.
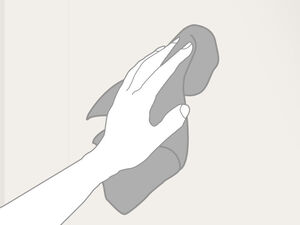
1
Clean the transfer surface.
Make sure it’s free from dust and grime to prevent the decals from sliding down or not sticking at all.

2
Peel off the edge of the backing and carefully position it against the wall.
If you’re having trouble with alignment, use painter’s tape to keep the decal in place as you peel off the backing.

3
Use a squeegee to press the decal.
It will also help prevent the appearance of unsightly bubbles.
| Final Dimensions | Description | Download |
|---|---|---|
| Templates |